Optimize Android App Development With Docker, SonarQube, Detekt, and MobSF
Improve the Security and Code Quality of Android apps by using SonarQube, Detekt, and MobSF combined in the Android software-quality-chain!

I'm a husband, dad, lifelong learner, tech lover, and Senior Engineer working as a Tech Lead. I write about projects and challenges in IT.
Paul Knulst in Android App Development • 13 min read
As an Android app developer, you should always want to implement the best code that is possible. Also, your app should be as secure as possible.
Code quality is very important for any kind of software and you should always try to optimize your implementation. This article shows and explains different quality tools that will be combined in an Android software-quality-chain to achieve better code quality, a more secure app, and improved maintainability.
tl;dr: Clone this GitHub repository into your Android project folder and execute the full chain with: sh software-quality-chain.sh. Afterward, open the URL that will be logged in to the console. Log in with admin:admin12345 and see your Android project report.
Prerequisites
Docker
To run the script Docker needs to be installed on your operating system.
Docker is a widely used platform for developing, shipping, and running all kinds of applications. It enables you to separate infrastructure from your applications to quickly deliver software from one machine to another.
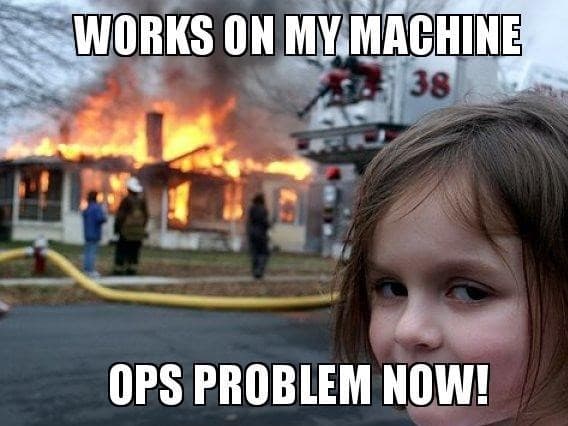
Implementing software while using Docker often negates infrastructure problems like the common "works on my machine" problem:
To install Docker on your system follow the official tutorial on docker.com. If you are using Windows and aren't allowed to install Docker Desktop you can follow this guide:
https://www.paulsblog.dev/how-to-install-docker-without-docker-desktop-on-windows/
Detekt
Detekt is
a static code analysis tool for the Kotlin programming language. It operates on the abstract syntax tree provided by the Kotlin compiler.
It can be implemented in any Kotlin-based Android app and can be used with a self-defined set of rules to check an app. Detekt is a mandatory prerequisite to executing the script and has to be installed within your Android App. Fortunately, this procedure is very easy and can be done in four simple steps:
1. Add Detekt to project build.gradle
dependencies {
    [...]
    classpath("io.gitlab.arturbosch.detekt:detekt-gradle-plugin:1.17.0")
}
2. Create a detekt.yml with a defined set of rules.
Download a sample gradle detek.yml file here and store it within project_folder/detekt/detekt.yml
3. Apply the detekt plugin in app build.gradle
apply plugin: "io.gitlab.arturbosch.detekt"
4. Add detekt block to app build.gradle
detekt {
    toolVersion = "1.17.0"
    buildUponDefaultConfig = false
    allRules = false
    config = files("../detekt/detekt.yml")
    baseline = file("../detekt/baseline.xml")
    input = files("src/main/java/com")
    debug = false
    reports {
        html {
            enabled = true
            destination = file("build/reports/detekt.html")
        }
        xml {
            enabled = true
            destination = file("build/reports/detekt.xml")
        }
        txt.enabled = false
        sarif.enabled = false
    }
Other Tools Used
MobSF
Mobile Security Framework (MobSF)
is an automated, all-in-one mobile application (Android/iOS/Windows) pen-testing, malware analysis and security assessment framework capable of performing static and dynamic analysis.
Before continuing, it is necessary to understand mobile security and how to create an android app securely. Luckily, OWASP (Open Web Application Security Project), a popular nonprofit organization that is known for community-led open-source software projects and for improving software security created the "OWASP Mobile Top Ten" to improve mobile security. These include the most critical security issues that should be avoided in any Android app:
Fortunately, MobSF can help you to identify many possible security issues in your Android app in an automated way. The security framework works best for:
local environment
performing a quick security test
implemented in CI/CD with mobsfscan (will be used here)
To test MobSF you can switch to https://mobsf.live and upload any Android APK that will then be analyzed for common security issues.
My advice: all developers should use MobSF to identify many security vulnerabilities during development by doing a static code analysis. This analysis will check the source code without running the application. It can be used during mobile application development and should be carried out regularly. Normally, it should be executed before every app release, update and Pull Request submission.
Keep in mind that using MobSF for static code analysis does not guarantee that your mobile application is safe! But it will help to identify the most obvious security flaws.
SonarQube
SonarQube
is an open-source platform developed by SonarSource for continuous inspection of code quality to perform automatic reviews with static analysis of code to detect bugs, code smells, and security vulnerabilities in 20+ programming languages.
For your projects, SonarQube analyzes source code (not only Android/Kotlin apps), evaluates the quality, and generates reports. It allows for the continuous monitoring of quality throughout time and combines static and dynamic analytic methods. SonarQube inspects and evaluates everything that has an impact on our code base, from inconspicuous styling decisions to serious design flaws.
As a result, developers can access and track code analysis information on everything from styling mistakes, potential bugs, and code defects to design inefficiencies, code duplication, inadequate test coverage, and excessive complexity. The Sonar platform examines source code from a variety of angles; as a result, it digs down to your code layer by layer, progressing from the module level to the class level. Additionally, it generates metrics and data at each level, highlighting problematic regions in the source that need to be examined or improved. It automatically detects what type of software you use: Kotlin-based Android app.
Other Features:
SonarQube does more than merely highlight issues. It also provides quality-management tools to proactively assist you in making corrections.
SonarQube provides information on a dashboard on code standards, test coverage, duplications, API documentation, complexity, and architecture in addition to issues.
It provides you with a current snapshot of the quality of your Android app code as well as trends in trailing (what has previously gone wrong) and leading (what is most likely to go wrong in the future) quality indicators.
It offers measurements to guide you in making the best choice for your Android app.
SonarScanner
The SonarScanner CLI is a scanner that can be used every time if there is no specific scanner for your build system. Additionally, the SonarScanner CLI can be run within a Docker container to test the Android app source code.
It is a simple command line tool that scans a provided folder (the Android app folder) with SonarQube-specific roles. After a successful analysis, it uploads all data to a SonarQube server where the results can be viewed.
Prepare Dockerfiles
Now, after explaining the prerequisites and tools they will be combined in Docker Compose files to be then used in a single bash script that will result in the software-quality-chain.
SonarQube/mobsfscan Docker Compose File
As described earlier SonarQube and mobsfscan will be used within the Android software-quality-chain. To be able to use them they will be deployed with Docker Compose as a service onto your operating system.
The following Compose file contains the SonarQube server, a PostgreSQL database for SonarQube, and the mobsfscan container to scan your Android app:
version: "3"

services:
  sonarqube:
    image: sonarqube:9.6-community
    depends_on:
      sonarqube_db:
        condition: service_healthy
    environment:
      SONAR_JDBC_URL: jdbc:postgresql://sonarqube_db:5432/sonar
      SONAR_JDBC_USERNAME: sonar
      SONAR_JDBC_PASSWORD: sonar
    healthcheck:
      test: wget --no-verbose --tries=1 --spider http://localhost:9000/api/system/status || exit 1
      start_period: 10s
      interval: 30s
      timeout: 10s
      retries: 10
    volumes:
      - sonarqube_data:/opt/sonarqube/data
      - sonarqube_extensions:/opt/sonarqube/extensions
      - sonarqube_logs:/opt/sonarqube/logs
    ports:
      - "9000:9000"
  sonarqube_db:
    image: postgres:12
    environment:
      POSTGRES_USER: sonar
      POSTGRES_PASSWORD: sonar
    healthcheck:
      test: [ "CMD-SHELL", "pg_isready" ]
      interval: 10s
      timeout: 5s
      retries: 5
    volumes:
      - postgresql:/var/lib/postgresql
      - postgresql_data:/var/lib/postgresql/data
  mobsfscan:
    image: opensecurity/mobsfscan
    depends_on:
      sonarqube:
        condition: service_healthy
    volumes:
      - ./../app/src:/src
    entrypoint:
      - mobsfscan
      - --sonarqube
      - -o
      - /src/result.json
      - /src
volumes:
  sonarqube_data:
  sonarqube_extensions:
  sonarqube_logs:
  postgresql:
  postgresql_data:
Within this file three services are defined: SonarQube, PostgreSQL, and mobsfscan. While SonarQube and PostgreSQL will just use a standardized Docker service that gets started, mobsfscan will have the project root bound as a volume and an overwritten entry point that executes instantly after the SonarQube container is started correctly and marked healthy (see healthcheck).
SonarScanner Compose File
Luckily, SonarScanner utility is also available as Docker Image and can be used and configured in a Compose file:
version: "3.7"
services:
  sonarscanner:
    image: sonarsource/sonar-scanner-cli
    network_mode: "host"
    env_file:
      - .sq.env
    command:
      - -Dsonar.projectKey=YourAppName
      - -Dsonar.exclusions=**/*.java
      - -Dsonar.externalIssuesReportPaths=./output/result.json
      - -Dsonar.kotlin.detekt.reportPaths=./app/build/reports/detekt.xml
    volumes:
      - "./../:/usr/src"
As you can see in this file we define a projectKey (YourAppName), set some exclusions (comma-separated list), and also add additional reports to the execution of SonarScanner (relative path from /usr/src). Also, we add the Android project root as volume and map it to /usr/src.
Additionally, this Compose file needs an environment file that will contain the SonarQube URL and a User Token which will be used to upload the analysis:
SONAR_HOST_URL=http://localhost:9000
SONAR_LOGIN=squ_3d9c193d3699d18db4f539725090d67caef0b964
Combining the Tools
Now, all Dockerfiles will be combined within the bash script called software-quality-chain which consists of these steps:
Increasing the heap count of the Docker environment
Install, configure, and start SonarQube and mobsfscan
Waiting until mobsfscan finish the analysis
Running complete Gradle checks
Importing a clean PostgreSQL database.
Executing SonarScanner and combining results before uploading to SonarQube
This bash script contains the final solution which will execute all steps:
#!/bin/bash

echo "Removing old output"
rm -f ../output/detekt.xml
rm -f ../output/result.json

echo "Increasing heap count for SonarQube"
sysctl -w vm.max_map_count=262144

echo "Starting SonarQube, mobsfscan"
DOCKER_BUILDKIT=1 docker-compose -f docker-compose.sq.yml up -d

echo "SonarQube is started, running mobsfscan"

echo "Waiting until scan is succesfully finished"
until [ -f ../app/src/result.json ]
do
     sleep 5
done

mv ../app/src/result.json ../output/result.json

echo "finished mobsfscan"

echo "running gradle detekt"
cd ..
sed -i 's/baseline = file("..\/detekt\/baseline.xml")/\/\/baseline = file("..\/detekt\/baseline.xml")/g' app/build.gradle
./gradlew detekt
sed -i 's/\/\/baseline = file("..\/detekt\/baseline.xml")/baseline = file("..\/detekt\/baseline.xml")/g' app/build.gradle
cd docker
cp ../app/build/reports/detekt.xml ../output/detekt.xml
echo "finished gradle detekt"

echo "preparing files to import into SonarQube"
sed -i 's/\/src\/main\//app\/src\/main\//g' ../output/result.json
sed -i 's/"filePath": null/"filePath": "app\/src\/main\/AndroidManifest.xml"/g' ../output/result.json

echo "Restoring SonarQube database with default user"
docker exec -i docker-sonarqube_db-1 //bin//bash -c "PGPASSWORD=sonar psql --username sonar sonar" < dump.sql

echo "Starting SonarScanner"
DOCKER_BUILDKIT=1  docker-compose -f docker-compose.scan.yml up -d

echo "SonarScanner started, will scan code now and upload data"
docker logs -f docker-sonarscanner-1
Increasing the heap count of the Docker environment:
To execute the SonarQube server without any problems you have to increase the max_map_count of the operating system running the Docker container because the default value is not sufficient.
You can read about it in the SonarQube documentation.
Install, configure, and start SonarQube and mobsfscan:
As the Docker Compose files already contain every important setting the only command that has to be executed here is running the Compose file in the background
Waiting until mobsfscan finish the analysis:
Unfortunately, the Docker Compose service of mobsfscan is only started by running the Compose file and the analysis is executed afterward. Because of this, the script has to block until the mobsfscan analysis finishes and successfully creates a result file. This "blocking" is done in lines 16 - 21 where the script waits until the result.json is created and then moves it to the output folder.
Running complete Gradle Detekt checks:
The next step is executing a complete gradle detekt task. It's called complete because sometimes developers use a baseline.xml file in their detekt configuration to mark legacy code as "ignored". Within this step, the baseline.xml file will be removed by commenting it out with sed and then running the gradle detekt task. Afterward, the detekt report will be copied to the output folder, and the usage of baseline.xml file will be restored.
Preparing files to import into SonarQube:
There are two small bugs if combining mobsfscan utility and SonarQube while creating and importing the result.json.
mobsfscan also finds issues in the project that is not suited to specific source files. Unfortunately, these issues cannot be imported correctly into SonarQube because SonarQube always needs a file to add an issue. Luckily, it is easy to identify these issues because they all have
filePath=null.mobsfscan lists all file paths of files from the app folder while SonarQube lists all files from the project folder.
Both issues will be fixed in line 35 and 36 where sed is used to replace the wrong entries with the correct one:
Line 35:
src/main->app/src/mainLine 36:
filePath=null->filePath="app/src/main/AndroidManifest.xml"
Importing a clean PostgreSQL database:
Before starting the SonarScanner to analyze the source code and upload the results to the SonarQube instance a clean PostgreSQL database backup will be imported into the SonarQube instance (Line 39). This has to be done because the freshly installed SonarQube instance does not contain a User Token that can be used to upload data. The provided PostgreSQL backup contains a User (admin:admin12345) and a User Token that already is set within the SonarScanner environment variables.
Without this step, you would have to switch to your SonarQube instance and log in with the default user (admin:admin). Then you have to switch to your account configuration and create a new User Token that can be used for analysis.
Executing SonarScanner and combining results before uploading to SonarQube:
The last step will be executing the Compose file for the SonarScanner (Line 42) and opening the docker logs for this instance to be notified if the analysis is complete.
Afterward, you will get an URL within the terminal that you can open in the browser, log in with admin:admin12345, and see the results of the executed analysis.
Run the Chain
Now, that everything is set upped and explained you can start software-quality-chain. If you followed the tutorial and created the files you still need this PostgreSQL database dump that you can save as dump.sql within the docker folder. If you did not manually create every file you can clone the complete GitHub repository into your Android project root.
Then you can run it by executing:
sh software-quality-chain.sh
Grab a coffee and wait until the chain finishes. There will be an URL within the CLI that you can copy to open the SonarQube instance. Log in with admin:admin12345 and start checking your improvements, security issues, and other stuff.
Possible Errors
If you are using this software-quality-chain you maybe encounter some errors that can be fixed easily!
SonarQube does not start
As told before, to run SonarQube you have to increase the max_map_count. Normally, this will be done by the command in Line 8. If you are working with Windows or do not have permission you have to update the command:
For Windows:
wsl sysctl -w vm.max_map_count=262144
Not able because of permissions:
sudo sysctl -w vm.max_map_count=262144
Cannot run docker-compose (Windows)
If you do not have Docker Desktop (or Rancher Desktop) it could happen that docker-compose cannot be executed from your terminal.
Sometimes it happens because you have to add wsl in front of every docker-compose command (c.f. Line 11):
DOCKER_BUILDKIT=1 wsl docker-compose -f docker-compose.sq.yml up -d
Cannot import PostgreSQL backup (Windows)
If you try to run the software-quality-chain within the Powershell or Git-bash while working with windows you normally will encounter an error while the script tries to restore the PostgreSQL database.
This happens because of a problem with the file encoding of the PostgreSQL dump that is used. To fix this problem connect to your WSL and restart the software-quality-chain. Alternatively, you can log into the running SonarQube instance with default user admin:admin, switch to accounts settings, and create a new user token. Then you can update the sq.env file to use this new user token. If you do this you have to remove the part from the software-quality-chain where the PostgreSQL backup will be inserted.
Software-Quality-Chain Improvements/Changes
As this chain is mainly suited for developers that want to run a quick full test for their android apps on their own computer, this chain could also be changed in some ways.
An important feature of the described chain is that it will run on ANY device running Docker because it automatically inserts a database while executing. This means that every time you run this chain you will have a freshly installed SonarQube that only contains results from the executed analysis.
But if you want to have a curve where you can see improvements while developing you have to persist the data from every consecutive analysis. Also, you can work with several members on the same SonarQube instance and use this chain within your CI/CD pipeline to automatically check after a Pull Request is merged into your release branch.
The following chapters cover changes that have to be made to use the chain in any of these ways.
Persisting Analysis Data
To persist data between consecutive analyses you simply have to adjust the software-quality-chain after the first run.
After your first successful run of the chain switch to lines 38 and 39 where the database import takes place.
You still need the first run because it will populate the database to have a working user token and the user to log in admin:admin12345.
Use a different SonarQube instance
If you are using a different SonarQube instance within the software-quality-chain you have to adjust the two files:
docker-compose.sq.yml: Remove the SonarQube and PostgreSQL container and only keep the mobsfscan. The Compose file will look like this:
version: "3"

services:
  mobsfscan:
    image: opensecurity/mobsfscan
    volumes:
      - ./../app/src:/src
    entrypoint:
      - mobsfscan
      - --sonarqube
      - -o
      - /src/result.json
      - /src
sq.env: Replace the URL with your SonarQube instance URL and update the Token to your user token
Also, remove the PostgreSQL database backup (Line 38/39).
Use it in CI/CD chain
To use this script in a CI/CD chain you have to combine previous sections. Remove the SonarQube instance by editing the Compose file, changing the URL/Token of sq.env, and removing the PostgreSQL backup.
Additional Tools
To further improve the quality of Android apps it is possible to enhance your Android project with two additional extra tools/commands that work well in combination with the software-quality-chain.
SonarLint Plugin for Android
The SonarLint plugin can be downloaded and installed manually from the JetBrains marketplace or you can easily install it from within Android Studio by opening Settings->Plugins and installing it.
Pre-Push Hook For Executing Gradle Detekt
To guarantee that all pushed files did not contain any error that will be found with Gradle you can install a pre-push hook into your .git folder. To do this open .git/hooks, create a new file called pre-push, make it executable (chmod +x), and paste the following content:
#!/bin/bash
echo "Starting detekt check"
./gradlew detekt
Closing Notes
I hope you enjoyed reading this article and will now use my software-quality-chain to significantly improve your code quality and make your app more secure. Keep in mind that software that has high quality can be maintained and enhanced more easily!
All files that were explained in this tutorial can be found in this GitHub repository. Download the whole folder, put it into your Android project root, and execute the software-quality-chain with:
sh software-quality-chain.sh
Keep in mind that on Windows you have to be connected to the WSL!
This is the end of this tutorial. Hopefully, you are now able to use my Android software-quality-chain. If you still have questions about anything that is not fully described you can just ask in the comment section. Also, if you enjoyed reading this article consider commenting with your valuable thoughts! I would love to hear your feedback about my developed chain.
This article was originally published on my blog at https://www.paulsblog.dev/optimize-android-app-development-with-docker-sonarqube-detekt-and-mobsf/
Feel free to connect with me on my blog, Medium, LinkedIn, Twitter, and GitHub.
🙌 Support this content
If you like this content, please consider supporting me. You can share it on social media or buy me a coffee! Any support helps!
Furthermore, you can sign up for my newsletter to show your contribution to my content. See the contribute page for all (free or paid) ways to say thank you!
Thanks! 🥰
Photo by Jamison McAndie / Unsplash